
Going mobile with React Native

When Facebook announced React Native I was amused. It is my chance to start developing mobile applications. I already know React and I can write most of my code using it.
If you haven’t seen @Vjeux talking about React Native on React.js Conf, you should definitely check it out before.
I want to share my path in making simple application for iPhone. I believe that experience should be enough to start creating bigger apps.
The Fair Pizza app
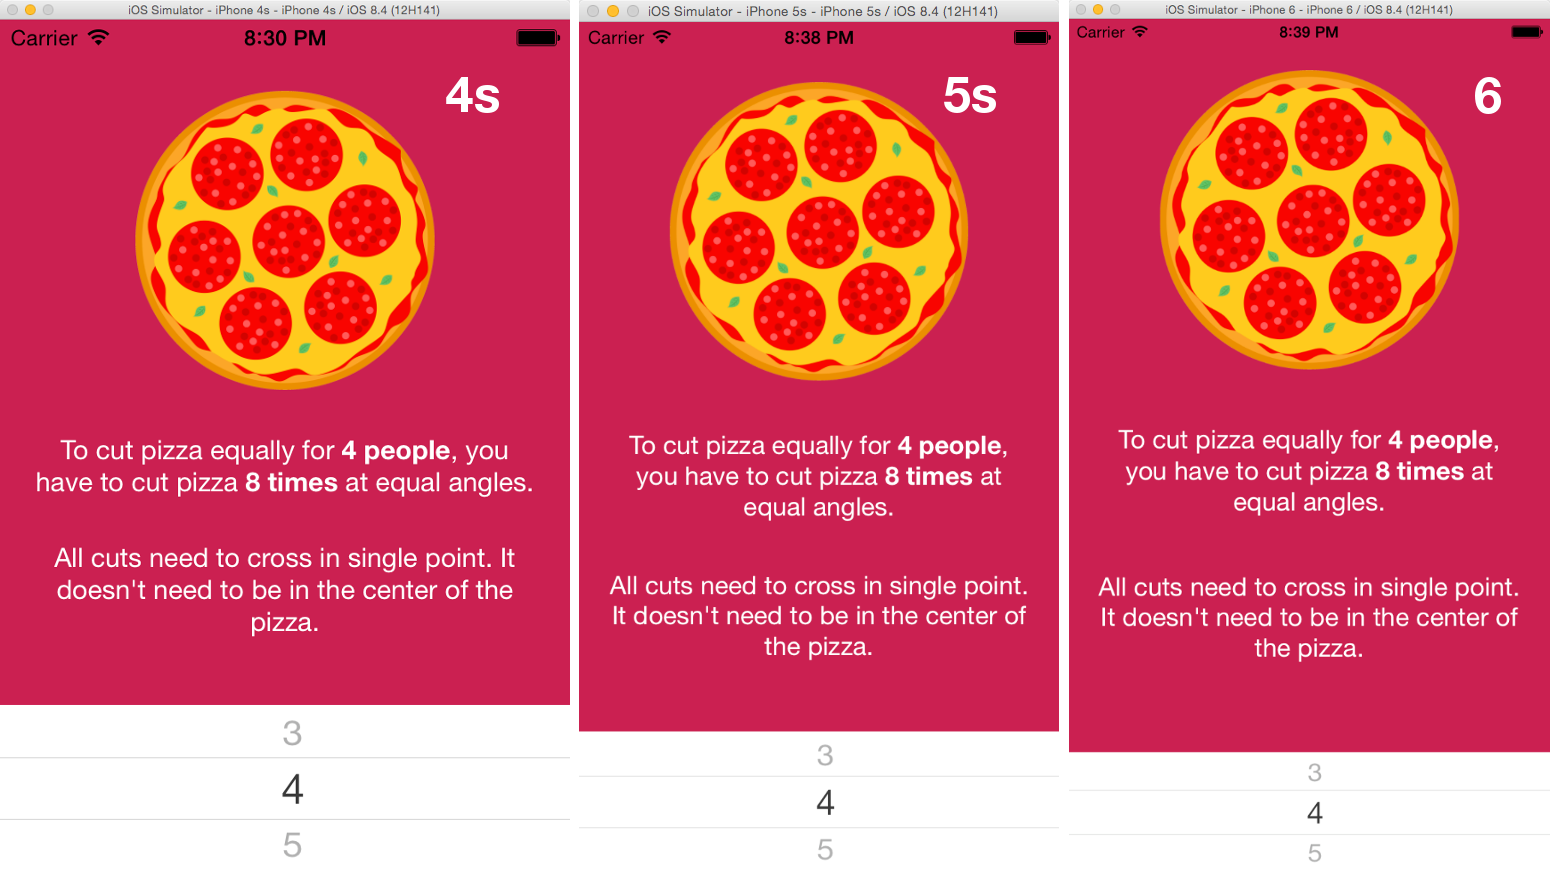
I wanted to start with something simple. Some time ago I came onto the Pizza theorem. The idea is to make an app that would give you an instruction how to cut pizza equally for 2-5 people.
Here’s an effect:
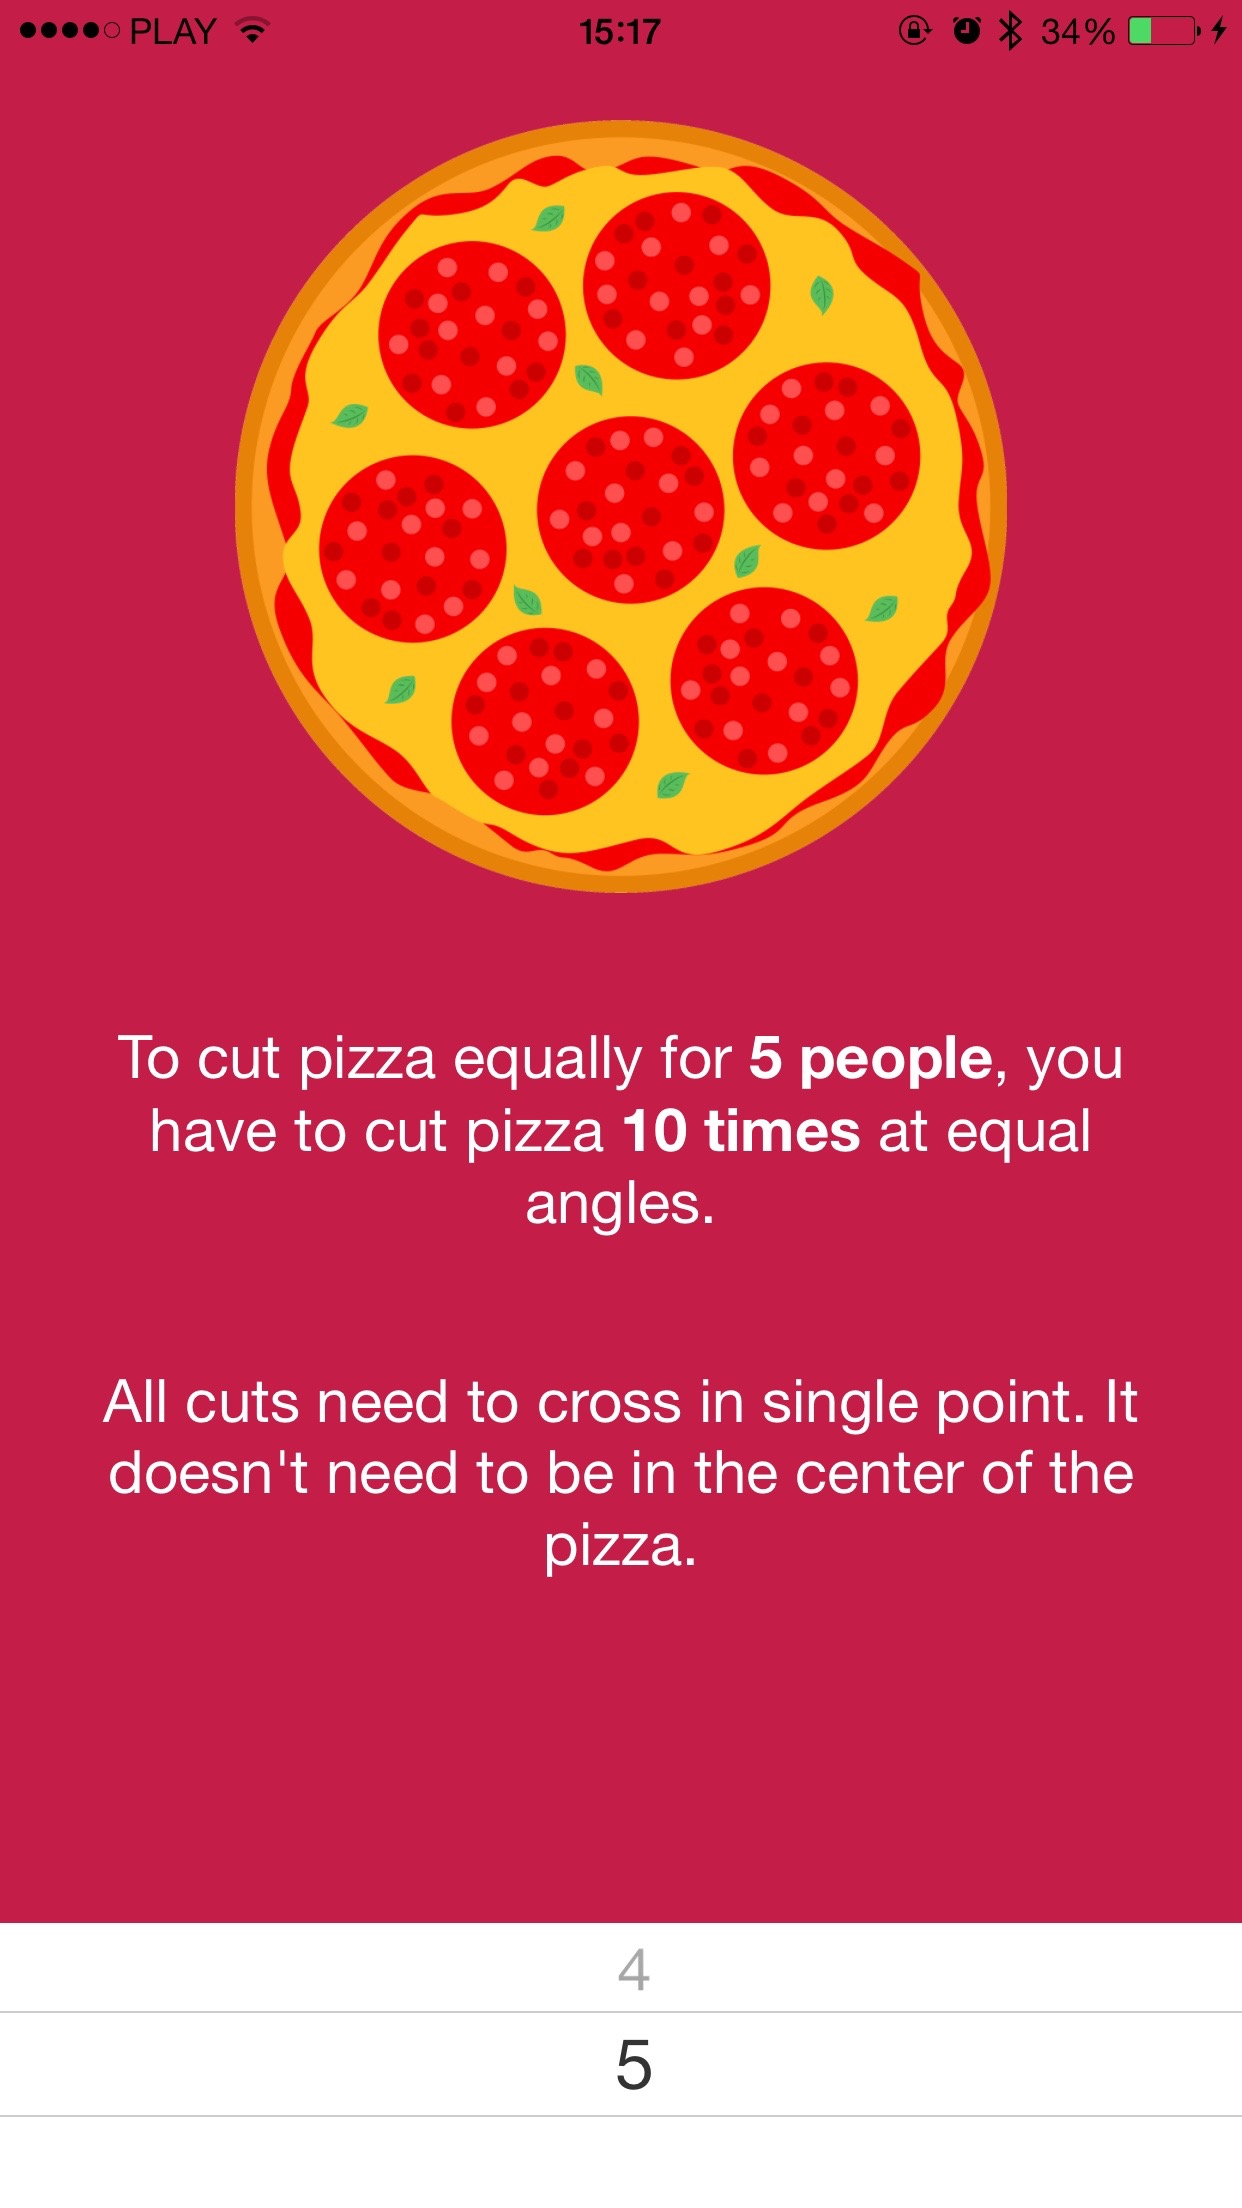
It’s a simple application with single screen and single number picker. There are more features to be implement, but they will be a topic for next blogposts.
The code of the application is open-source. You can see it here.
Installation
Let’s follow official React Native starting guide here.
React Native let us develop apps only for iOS (Android version is comming soon). You will need computer with OS X and XCode in version >= 6.3. You would also need to have Homebrew to install all the dependencies.
If you have Node.js installed, you will need to unlink it. Don’t worry, it’s compatible with Node and NPM.
brew unlink node
Now install io.js:
brew install iojs watchman && brew link iojs —force
Now, we can just install React Native npm package:
npm install -g react-native-cli
(optional) Facebook team recommends installing watchman:
brew install watchman
Project setup
Project creation couldn’t be simpler. Just enter this command:
react-native init OurProjectName
After that, you will find entire XCode project in OurProjectName directory.
Basics of React Native
File index.ios.js is a starting point of React Native application. Babel transpiles the code, so you will have enabled most of the ES6 features. You can read about available transformations in React Native documentation.
You can use CommonJS modules, so it’s easy to split your app into separate files.
Ok, let’s dive into Fair Pizza app code.
Building application window
As mentioned before, all React Native applications starts in index.ios.js file. Let’s see how this file looks like in Fair Pizza:
var React = require('react-native');
var {
  AppRegistry,
  StyleSheet,
  Text,
  View,
} = React;

var Pizza              = require('./Pizza');
var CuttingInstruction = require('./CuttingInstruction');
var PeopleCountPicker  = require('./PeopleCountPicker');

class FairPizza extends React.Component {
  constructor(props) {
    super(props);
    this.state = { peopleCount: 4 };
    this.setPeopleCount = this.setPeopleCount.bind(this);
    this.cuttingEdges = this.cuttingEdges.bind(this);
  }

  setPeopleCount(peopleCount) {
    this.setState({ peopleCount: peopleCount });
  }

  cuttingEdges() {
    return this.state.peopleCount * 2;
  }

  render() {
    return (
      <View style={styles.app}>
        {this.pizza()}
        {this.cuttingInstruction()}
        {this.peoplePicker()}
      </View>
    );
  }

  pizza() {
    return (
      <View style={styles.pizza}>
        <Pizza cuttingEdges={this.cuttingEdges()} />
      </View>
    );
  }

  cuttingInstruction() {
    return (
      <View style={styles.cuttingInstruction}>
        <CuttingInstruction
          cuttingEdges={this.cuttingEdges()}
          peopleCount={this.state.peopleCount}
        />
      </View>
    );
  }

  peoplePicker() {
    return (
      <View style={styles.peoplePickerWrapper}>
        <View style={styles.peoplePicker}>
          <PeopleCountPicker
            peopleCount={this.state.peopleCount}
            setPeopleCount={this.setPeopleCount}
          />
        </View>
      </View>
    );
  }
}

var styles = StyleSheet.create({
  app: {
    flex: 1,
    backgroundColor: '#C41D47',
  },
  pizza: {
    alignSelf: 'center',
    marginTop: 40
  },
  cuttingInstruction: {
    alignSelf: 'center',
    padding: 20,
    paddingTop: 0
  },
  peoplePickerWrapper: {
    flex: 1,
    justifyContent: 'flex-end',
  },
  peoplePicker: {
    height: 95,
    overflow: 'hidden',
    justifyContent: 'flex-end',
  }
});

AppRegistry.registerComponent('FairPizza', () => FairPizza);
If you are familiar with React, you won’t have any troubles with reading this code. I splitted the main application window into 3 separate components:
- Pizza image
- Cutting instruction
- People count picker
The next thing you could have noticed is styles variable. You can pass styles just as a simple hashes or use a StyleSheet. They are quite like a styles you may know from web version of React.
The last thing we need to do is to register component - last line handles that.
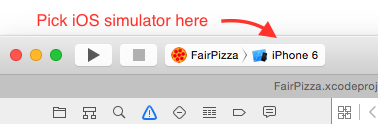
You can run the app without any iOS device - you can just use simulator built-in XCode.
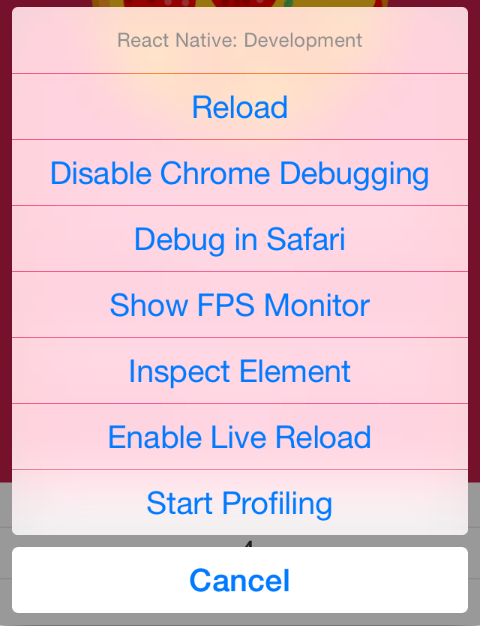
JavaScript code debugging
When you open-up the application in iOS simulator, you can launch React Native Debugger in your browser. Just press cmd-d key combination in simulator window and pick browser for debugging.
Problems
If you had some experience with React, the code of whole application should be fairly understandable for you. It may seem simple, but I came onto some issues during development.
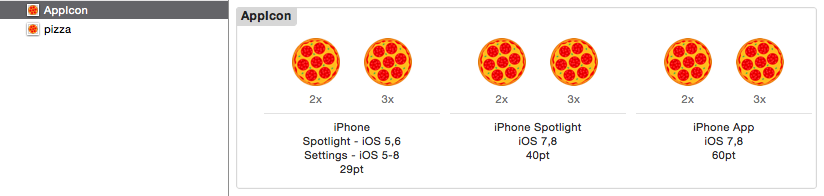
Adding images to XCassets
To render pizza image from image file, I had to store the image somewhere in the application. I followed the official guide. The app didn’t want to compile until I have declared AppIcon (with all required sizes!). I found this website to convert my image for all required size.
Styling app for different screens
Apple currently support phones with four different screen types. All of them can have different aspect ratio, different size, different resolution. That’s a bit problematic for Fair Pizza app - it is supposed to be single-screen.
React Native has a PixelRatio class that make it easier to develop look of apps for screens with different pixel density. It’s not very useful in this case, but code of this class pointed out to class called Dimensions. It’s not mentioned in web documentation, but it is well commented.
Dimensions class let me get real width and height of device with running app.
let isLegacy = () => {
  let window = Dimensions.get('window');
  return (window.height * window.scale) < 1100;
}
let isIphone5 = () => {
  let window = Dimensions.get('window');
  return (window.height * window.scale) < 1300;
}
Running the app on an iPhone
App is ready, it works fine on XCode simulator. It’s high time to run it on the real device. We just need to plug the phone to the computer and start the application directly on device. It will require us to log in with our AppleID.
By default, JavaScript code will be loaded from Node server that works on development machine. If you want to run the code on your device, you need to pass ip address of the server explicitly in AppDelegate.m file.
jsCodeLocation = [NSURL URLWithString:@"http://0.0.0.0:8081/index.ios.bundle"];
In this case, the code will be loaded from ip address 0.0.0.0 (localhost). You need change that value to the IP address of your computer. You just need to take care of both Mac and iPhone being connected to the same network.
That way of serving JavaScript is obviously not very convenient. It requires connection to React Native Node server. We can serve this code directly from app. You just need to change the value of jsCodeLocation in AppDelegate.m
jsCodeLocation = [[NSBundle mainBundle] URLForResource:@"main" withExtension:@"jsbundle"];
And now, our application is ready to be run independently on the phone.
What’s next?
There are couple of features I would like to add to this application later:
- Drawing cutting lines on pizza - I want to learn how to draw lines on my pizza image. I already found the library that may be useful for this.
- More elegant solution for styling different types of screens
- Rotate animation for pizza
Stay tuned for more blogposts. You can sign up for the newsletter below to receive information about new entries on our blog.
The pizza image has been designed by Freepik.